
Transportation Spend Management (TSM)

Add New Contract

The following instructions explain how to add a contract. You can upload a contract or manually enter the data.

  1. From the Contract Management page, click + Add Contract.
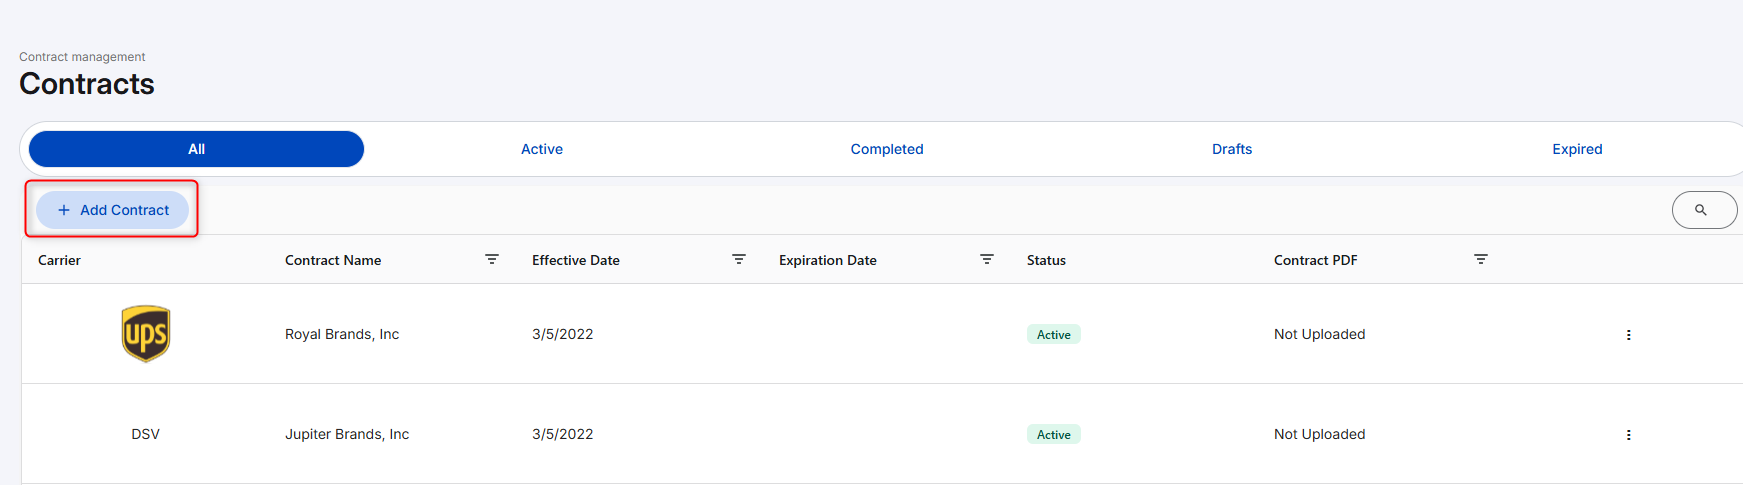
Add Contract.png
Add Contract
  1. The Add New Contract wizard displays. The following table explains each step.

Add Contract Navigation tips:

  • Click Back or associated tab to return to previous step.

  • Click into grid field to select values.

  • Press Tab to move to next field in grid.

  • The trash can icon Trash icon.png deletes the entry.

  • Click Cancel to close wizard and not save entries.

  • Click Save as Draft to save entries and complete later.
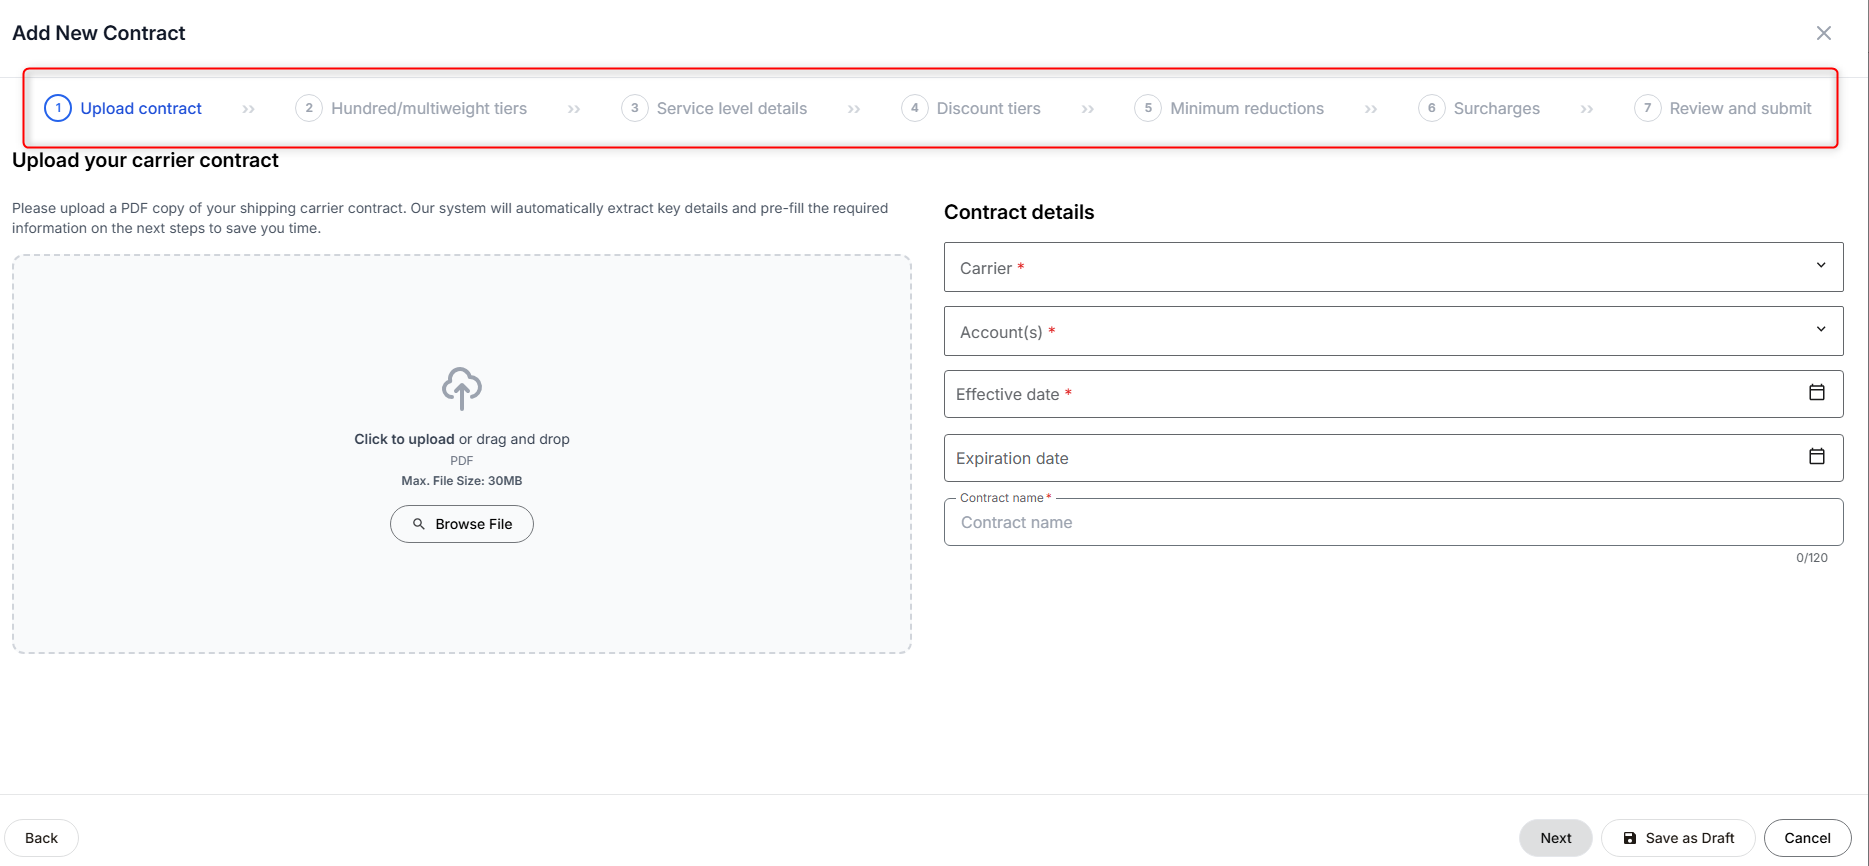
Add Contract Wizard.png
Add New Contract

Add Contract Step

Instructions

1

Upload contract

Upload contract

  1. Click Browse File to upload PDF.

Click View sample contract PDF for an example.

  1. The Contract details section populates along with each section of the wizard.

  2. Click Next to review each section of the wizard. Edit as needed.

Edit or manually enter carrier details

  1. Select Carrier from options.

  2. Select Accounts.

  3. Enter Contract Name. If needed use search field.

  4. Use Calendar icon to select Effective date.

  5. Use Calendar icon to select Expiration date.

  6. Enter Contract Name.

  7. Once complete, click Next or Save as draft. Click View uploaded contract from any of the steps as a reference.

2

Hundred/multiweight tiers

Edit or manually enter Minimums and Tiers
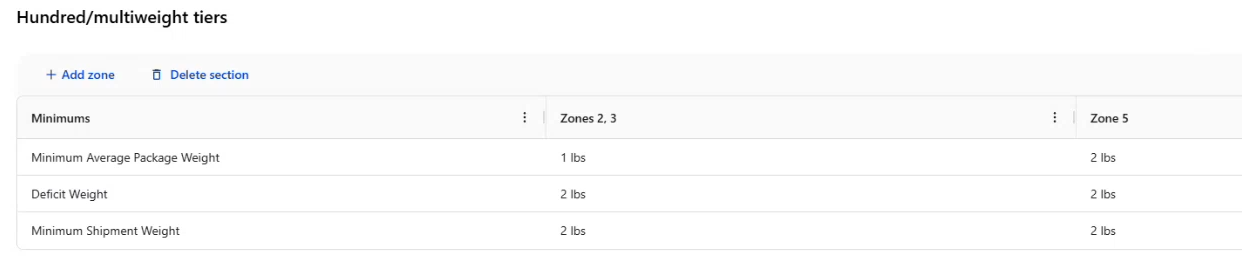
  1. Edit or enter minimums (FedEx only).

    1. Click +Add Minimums to manually add.

    2. To delete the section, click Delete Section.

    3. To add a zone, click +Add Zone.

Minimum.png
Minimums
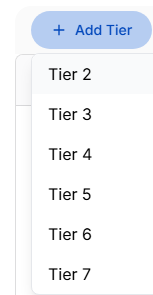
  1. Click Add Tier and select the Tier number.

Tier Number.png
Select Tier Number
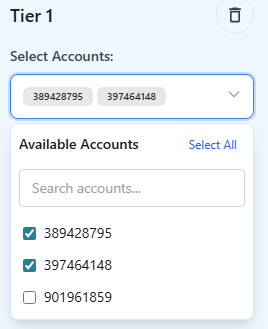
  1. Select Accounts from options.

Tier Accounts.png
Select Accounts
  1. Repeat steps 2-3 as needed.

  2. Once complete, click Next or Save as draft.

3

Service level detail

Edit or manually enter service level details

  1. Click + Add weight. A new row with the next weight range displays.

  2. Click + Add zone and select from options.

  3. If a section is not needed, click Delete section.

If needed, click Trash Trash icon.png to remove a row.

  1. In the DIM Divisors section, click + Add service

    1. In the new row, click Service Group… and select from the options.

    2. Enter the Divisor value.

  2. Once complete, click Next or Save as draft.

4

Discount tiers

Edit or manually enter discount tiers

  1. For FedEx only (if applicable):

    1. From the Grace period discount drop-down menu, select Yes.

    2. Enter number of weeks.

  2. Click + Add service. A new row displays in the grid.

  3. Select Services from options.

  4. Enter tier values.

  5. Click + Add tier to add additional price ranges and percentage.

  6. Click +Add discount tier group to add multiple tier sets.

  7. Repeat steps until all discount tiers are added to the grid, click Next or Save as draft.

5

Minimum reductions

Edit or manually enter minimum reductions

  1. Click + Add service. A new row displays in the grid.

  2. Click Select service… and choose from options.

  3. Select Minimum Per from options.

  4. Select Applicable Zones.

  5. Select Adjustment Value and enter the value in the next column.

  6. Select Base Rate Zone from options.

  7. Select the Base Rate Weight from options.

  8. Repeat steps until all minimum reductions are added into the grid, click Next or Save as draft.

6

Surcharges

Edit or manually enter surcharges

  1. Click + Add surcharge. A new row displays in the grid.

  2. Click Select accessorial… and choose from options.

  3. Select Zone.

  4. Select Discount tier from options

  5. Select Incentive value from options and enter the value in the next column.

  6. Repeat steps until all surcharges are added to the grid, click Next or Save as draft.

  7. If applicable, click + Add Minimum Billable Weights.

7

Review and submit

Read only view of contract details. Click Submit or Save as draft. Refresh contract page to review added contract.

  1. The added contract displays in the grid portion of the Contact page. Click the vertical ellipsis to view, edit, delete, or rerate charges. Refer to Manage Contracts.

To edit a contract, you can also click on the contract’s grid row.